Team Account
Learn how to create and manage your team account, customize team settings, and collaborate effectively with tDoc's powerful team features.
🤝 Understanding Team Accounts
Team accounts in tDoc allow you to collaborate with colleagues, share resources, and manage AI receptionists as a group. Each team has its own workspace, settings, and permissions structure.
✨ Creating a Team Account
After signing in to your personal account, you can easily create a new team:
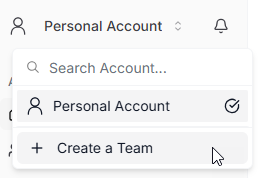
- Click the "Personal Account" dropdown menu in the top left corner
- Select "Create a Team"
- Enter your team name (2-50 characters, avoid special characters)
- Click "Create Team"
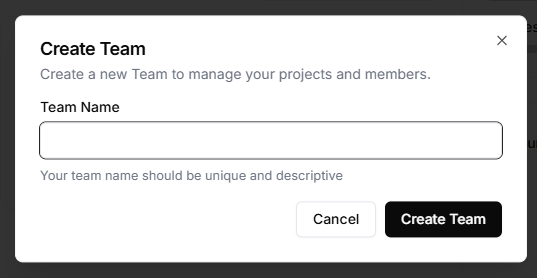
Once created, you'll be redirected to your new team's dashboard where you can begin setting up your workspace.
📊 Team Dashboard
Your team dashboard is your command center for managing everything related to your team:
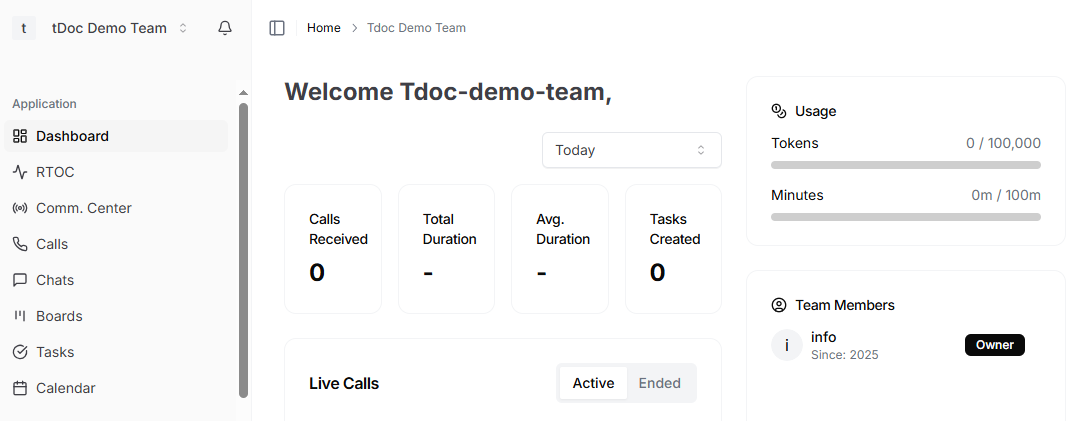
From here you can:
- 🤖 Access team resources and AI agents
- ⚙️ Manage team settings and members
- 📈 Monitor usage and activity
- 📱 Purchase and manage phone numbers
⚙️ Managing Team Settings
To manage your team's settings, click on "Settings" in the left sidebar. This opens the team settings page with various configuration options.
🖼️ Update Team Logo
Personalize your team's identity with a custom logo:
- Go to Settings > Team Logo
- Click on the logo area to upload a new image
- Select and crop your image as needed
- The new logo will appear throughout your team's workspace
✏️ Change Team Name
Keep your team name relevant as your organization evolves:
- Navigate to the Settings > Team Name section
- Enter your preferred team name in the field
- Click "Update Team Name" to save your changes
🕒 Set Team Timezone
Ensure all time-related features in your team workspace display correctly:
- Find the Timezone section in Settings
- Select your team's timezone from the dropdown menu
- Click "Update Timezone" to apply the change
All team members will see times displayed according to this timezone setting.
👥 Team Membership Management
✉️ Inviting Team Members
To add colleagues to your team:
- Navigate to the "Members" section from the sidebar
- Click "+ Invite Member"
- Enter email addresses and select appropriate roles
- Send the invitations
New members will receive an email invitation with a link to join your team.
🔑 Managing Member Roles
Team members can have different roles with varying permission levels:
- 👑 Owner: Full access to all team settings and features (only one primary owner per team)
- 👤 Administrator: Full system access to configure settings
- 👤 Member: Standard access to team resources
- And additional specialized roles (Editor, Agent, Limited, ReadOnly, Billing, Clinical)
As the team owner, you can update roles and permissions from the Members section. See Roles and Permissions for full details.
👋 Leaving a Team
If you're not the primary owner and need to leave a team:
- Go to the team's Settings page
- Scroll down to the "Danger Zone" section
- Click "Leave Team"
- Type "LEAVE" in the confirmation field
- Confirm your decision
❌ Team Account Deletion
If you're the primary owner and need to delete the team account:
- Go to Settings and scroll to the "Danger Zone" section
- Click "Delete Team"
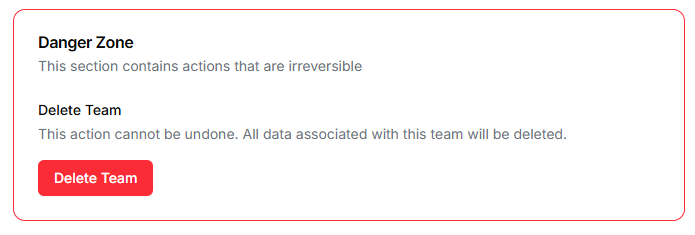
- Read the warning about permanent data deletion
- Request a verification code sent to your email
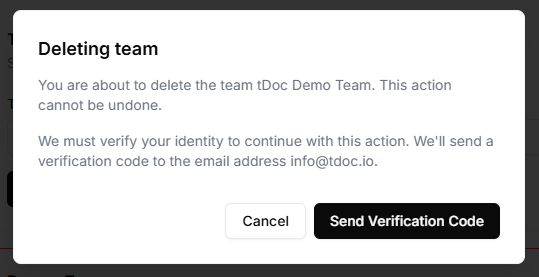
- Enter the code when prompted
- Confirm to complete the deletion
⚠️ Important: This action permanently removes the team account and all associated data including:
- All team members' access
- AI agents and their conversation history
- Phone numbers (will be released)
- All team settings and customizations
💳 Team Billing
Manage your team's subscription and payment details:
- Navigate to "Billing" from the sidebar
- View your current subscription plan
- Update payment methods
- Review usage and invoices
Your team subscription may be based on per-seat billing, which automatically adjusts as members are added or removed.
🚀 Next Steps
Now that you're familiar with team accounts, here's what you can do next:
- 🤖 Set up your first team AI agent
- ✏️ Customize your agent's prompts for team-specific responses
- 📊 Explore the analytics dashboard to track team performance
- 🔗 Set up integrations with your team's existing tools